@tria-sdk/react-native
The @tria-sdk/react-native module facilitates user onboarding for your dapp by providing support for social (e.g., Google, Facebook), mobile, email, and @tria and password signup and logins, along with full customizability to tailor the design and flow to your specific dApp requirement.
1. Installation
You can install the SDK using npm, yarn:
yarn add @tria-sdk/react-native @tria-sdk/react-native-core @tria-sdk/core @tria-sdk/constants @tria-sdk/chains
Install all the polyfill dependencies
yarn add fastestsmallesttextencoderdecoder node-libs-react-native react-native-url-polyfill react-native-get-random-values core-js @ethersproject/shims react-native-localstorage-polyfill text-encoding react-native-crypto
Install all the peer dependencies
yarn add react-native-gesture-handler @gorhom/bottom-sheet @react-native-async-storage/async-storage @react-navigation/native @react-navigation/native-stack @shopify/flash-list @shopify/react-native-skia @tradle/react-native-http [email protected] react-native-background-timer react-native-inappbrowser-reborn react-native-level-fs react-native-os react-native-randombytes react-native-reanimated react-native-safe-area-context react-native-screens react-native-svg
Install all the Dev Dependencies
yarn add -D metro-config metro-react-native-babel-preset react-native-dotenv @babel/plugin-proposal-export-namespace-from
2. Setting up the SDK
Create polyfills.js
import 'fastestsmallesttextencoderdecoder';
import 'node-libs-react-native/globals';
import 'react-native-url-polyfill/auto';
import 'react-native-get-random-values';
import 'core-js/stable/atob';
import '@ethersproject/shims';
import 'react-native-localstorage-polyfill';

localStorage.init();
global.localStorage = localStorage;

const TextEncodingPolyfill = require('text-encoding');
global.Buffer = require('buffer').Buffer;
global.process.version = 'v18.0.0';

Object.assign(global, {
  TextEncoder: TextEncodingPolyfill.TextEncoder,
  TextDecoder: TextEncodingPolyfill.TextDecoder,
});

class Event {
  constructor(name) {
    this.name = name;
  }
}

global.Event = Event;
global.document = {
  dispatchEvent: event => {
    console.log(event);
  },
};

const timers = {};
global.console.time = label => {
  timers[label] = Date.now();
};
global.console.timeEnd = label => {
  const duration = Date.now() - timers[label];
  console.log(`${label}: ${duration}ms`);
};
require('crypto');
Add this in your React Native Project in index.js
/**
 * @format
 */

import './polyfills'; // Make sure the first line is import of polyfills
import {AppRegistry} from 'react-native';
import App from './App';
import {name as appName} from './app.json';

AppRegistry.registerComponent(appName, () => App);
Update your metro.config.js
const {getDefaultConfig, mergeConfig} = require('@react-native/metro-config');

const config = getDefaultConfig(__dirname);

module.exports = mergeConfig(config, {
  transformer: {
    getTransformOptions: async () => ({
      transform: {
        experimentalImportSupport: false,
        inlineRequires: false,
      },
    }),
  },
  resolver: {
    extraNodeModules: {
      ...require('node-libs-react-native'),
    },
  },
});
Update babel.config.js
module.exports = {
  presets: ['module:@react-native/babel-preset'],
  plugins: [
    'module:react-native-dotenv',
    '@babel/plugin-proposal-export-namespace-from',
    'react-native-reanimated/plugin',
  ],
};
3. Usage
TriaProvider & Navigation Container:
Go to your App.tsx wrap your code with TriaProvider:
<NavigationContainer fallback={<Text>Loading...</Text>}>
	<TriaProvider
		uiConfig={{
			dappName: 'Dapp Name',
			// ...
			authenticatedScreen: 'Dashboard',
		}}
		didDomain="@tria"
		config={{
			chain: 'FUSE',
			triaStaging: process.env.REACT_NATIVE_PUBLIC_SDK_BASE_URL,
			aaSolana: {
				shyftApiKey: 'YOUR_KEY', // Required: For Solana Sponsored Transactions
				isSponsored: true, // Required: For Solana Sponsored Transactions
			},
			aa: {
				pimlicoApiKey: 'YOUR_KEY', // Required: For Sponsored Transactions
				isSponsored: true, // Required: For Sponsored Transactions
				sponsorshipPolicyIds: {
					// Required: For Sponsored Transactions
					FUSE: 'sp_cheerful_thing',
					ARBITRUM: 'sp_narrow_vulture',
					POLYGON: 'sp_slim_namor',
				},
				accountType: 'Etherspot',
				supportAa: true,
			},
			supportedChains: ['FUSE'], // Required: Supported Chains
		}}
		authedScreenName="Dashboard"
		clientId="TRIA_CLIENT_ID" // Required: Provided by Tria
		schema="YOUR_APP_SCHEMA"> // Required: Your App Schema
		<Stack.Navigator
			screenOptions={{
				headerShown: false,
			}}
			initialRouteName="Home">
			<Stack.Screen name="Home" component={Home} />
			<Stack.Screen name="TriaAuth" component={TriaAuthScreen} />
			<Stack.Screen name="Dashboard" component={DemoDashboard} />
		</Stack.Navigator>
	</TriaProvider>
</NavigationContainer>
The Analytics Keys are required. Get your client id by signing up at https://terminal.tria.so/
useInit Hook
Now final step is to trigger the Tria flow using useInit hook in your DApp:
import React from 'react';
import {Pressable, Text, View, StyleSheet} from 'react-native';
import {useInit} from '@tria-sdk/react-native';
function SDKDEMO({navigation, route}: any) {
  const {init} = useInit();
  return (
    <View style={styles.container}>
      <Pressable
        style={styles.button}
        onPress={() => {
          init('SdkDemo');
        }}>
        <Text style={styles.text}>Get Started</Text>
      </Pressable>
    </View>
  );
}

const styles = StyleSheet.create({
  container: {
    flex: 1,
    justifyContent: 'center',
    alignItems: 'center',
  },
  button: {
    backgroundColor: 'blue',
    padding: 10,
    borderRadius: 5,
  },
  text: {
    color: 'white',
  },
});

export default SDKDEMO;
Create a new Tria Auth screen:
Create a screen where we add AuthComponent from @tria-sdk/react-native and wrap with GestureHandlerRootView
// TriaAuthScreen.tsx
import React from 'react';
import {AuthComponent} from '@tria-sdk/react-native';

import {GestureHandlerRootView} from 'react-native-gesture-handler';

function TriaAuthScreen() {
  return (
    <GestureHandlerRootView style={{flex: 1}}>
      <AuthComponent />
    </GestureHandlerRootView>
  );
}
export default TriaAuthScreen;
4. Demo
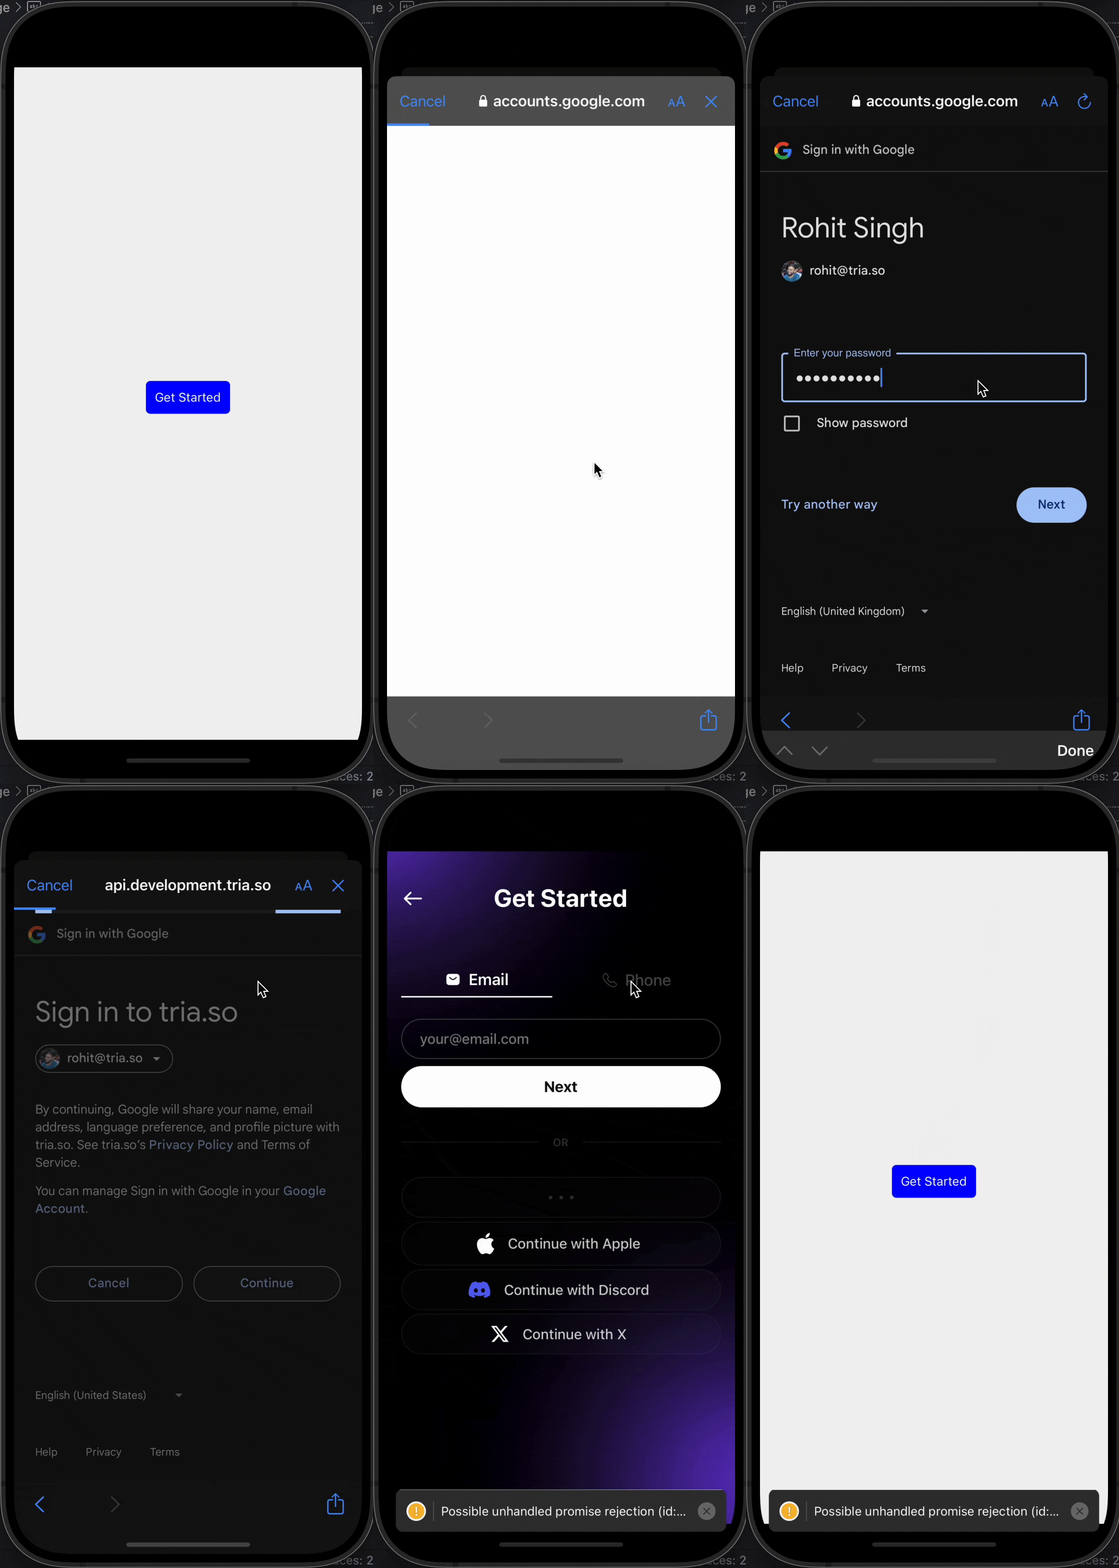
Below you can see the demo of the Tria SDK in action with different login methods:
Login with Email + OTP

Login with Social Auth

5. Configuring the TriaProvider
Configuration Options
The TriaConfigOptions interface allows you to configure the following properties:
chain [string]: The blockchain network (e.g., 'MUMBAI', 'POLYGON').customChain [object]: Optional custom chain data.environment [string]: The environment ('testnet' or 'mainnet').dappDetails [object]: An object containing your Dapp's domain and logo.aa [object]: Optional Account Abstraction details.rpcUrl [string]: Optional RPC URL for the blockchain network.supportedChains [string array]: An array of strings containing the supported chains